Create & Export New Products
Note: before following this guide, your e-commerce store needs to be linked to Styriashirts. Not sure if it is? Check here!
Step 1 - Create a product
Choose a product from our catalogue.
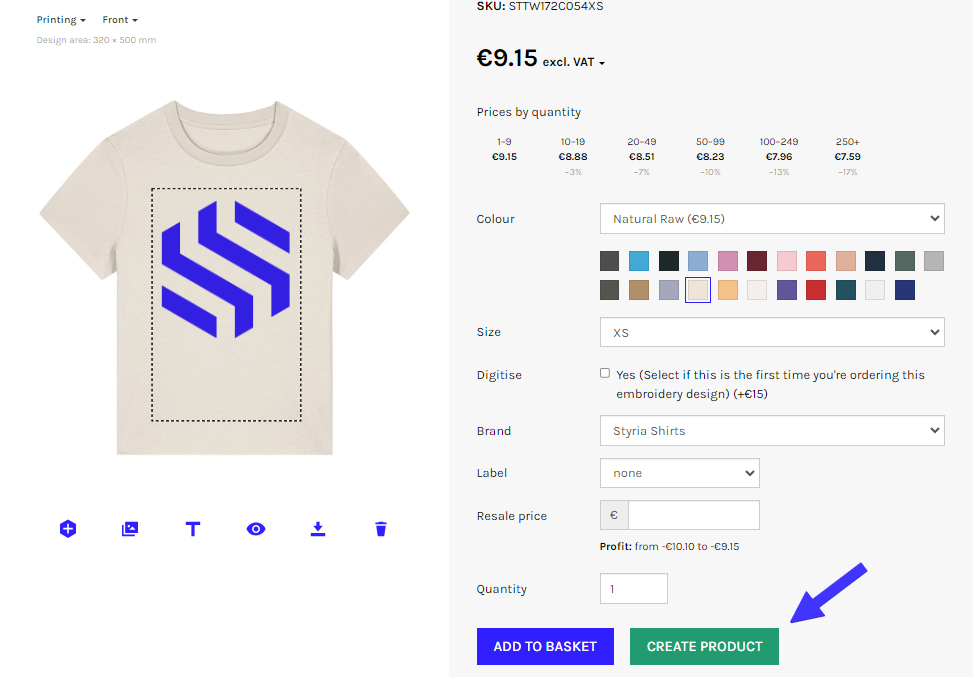
Once you’ve chosen a product, you can upload your design. To start customising your new product, upload your design to the product designer using the Upload Image button.

Then position the design where you want it to be printed.
.png)
Once you are happy with your product, click "Create Product" to save the product you've designed.
Step 2 - Export the product to your connected store
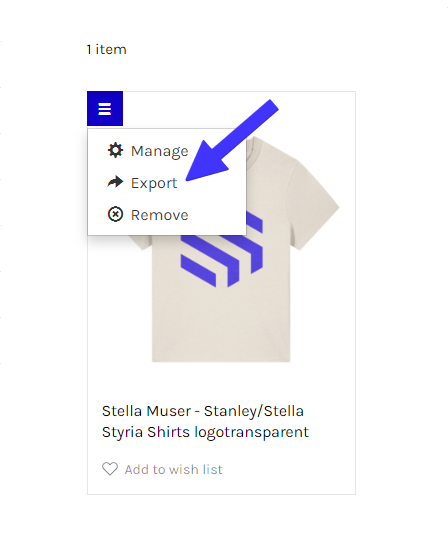
Once you've created your product, you need to make it visible in your store. You can always find your saved products here.
Once you can see your created product with the design, click the three lines and the "Export" button to begin moving this product to your store.
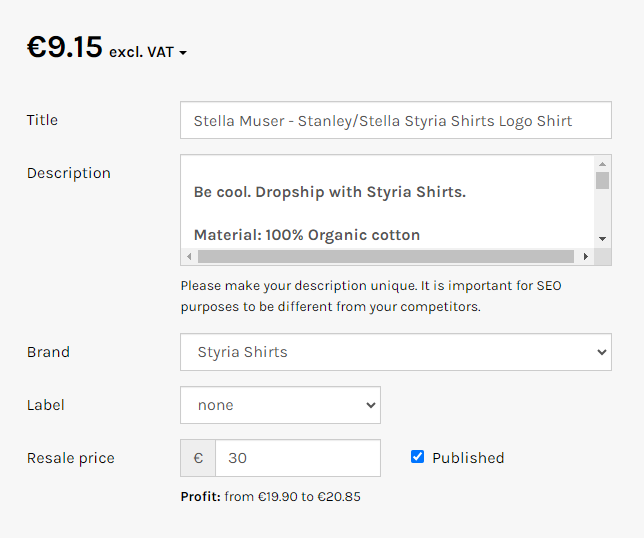
You must then name your product, create a description (a basic info description will already be provided, you can edit it to give it your personal touch) & select your Brand.
Don’t forget to set a Resale price and check the profit margin!
By checking the Published box, you make the new product published as an active product.
Next, you must choose the Variants that you wish to export to your store.

You can export several variants at a time:
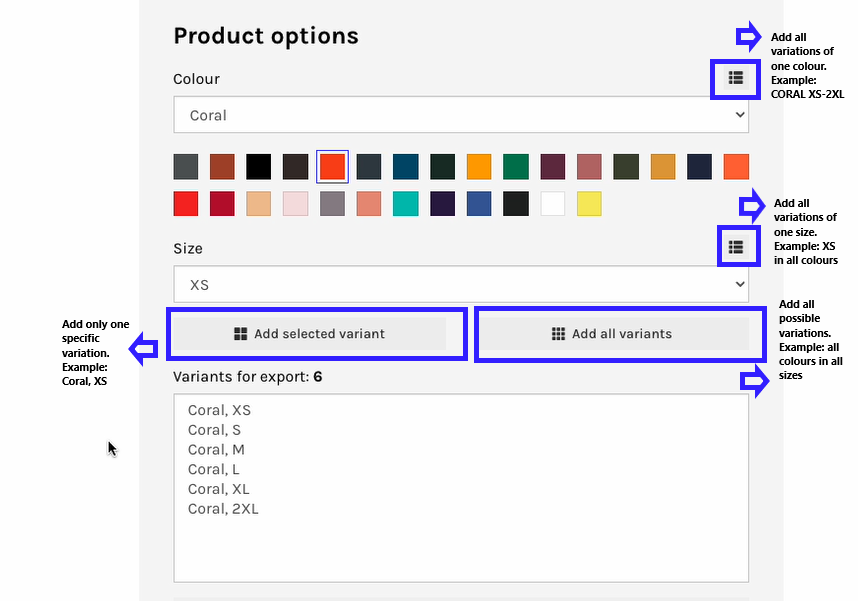
All selected variants are listed in the Variants for export field.
You can select up to 100 variants to export; this is due to some limitations with some e-commerce stores.
If you've added all the options that you want to export, select your store from the drop down menu and select Export to.
Once the export is finished, you'll see a pop-up with a confirmation that the product is exported.